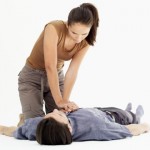
 Would you know what to do in an accident? Most people would be caught unawares when faced with a life or death situation, but you need not be one of them. Here is a post on CPR, an essential technique that can help you possibly save lives. CPR or cardio pulmonary resuscitation is a very important tool when it comes to saving someone’s life. It is a technique that involves both restarting a person’s heart as well their breathing. Here are the steps you should follow while performing CPR.
Step 1: Assess the extent of the person’s injuries. You could try tapping them or calling their name in a loud clear voice. If he/she responds, it means they are aware of their surroundings. In such a case, you do not need to provide CPR.
Step 2: If the person is unresponsive, check for the person’s breathing and pulse.
Step 3: In order to check for breath sounds, either look for rising and falling of the chest, or put your ear close to the patient’s nose. If the person is breathing, do not perform CPR. Performing CPR on a live person can be fatal.
Step 4: If the person has no pulse and is not breathing, tilt the person’s head backwards, and open his/her mouth by pulling the jaw forward. This is meant to clear up the person’s airway and help him/her breathe normally.
Step 5: If the person still does not start breathing, start CPR. First, make the person lie flat on his/her back on the ground. This step is important so that you don’t injure the person further during chest compressions.
Step 6: Next, sit on your knees, with your upper body erect near the person’s body.
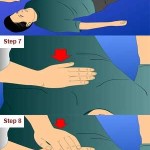
Step 7: Place the base of your palm on the person’s breast bone. This is the bone that is found in the center of the chest, exactly between the nipples
Step 8: Place your second hand on top of the first hand, palm facing downwards.
Step 9: Now, to start compressions move your body over your hands, and keep your elbows locked. This will make your hands rigid and help you apply more pressure.
Step 10: Interlace your fingers, and give 30 chest compressions. Press down on the person’s chest in a rhythmic manner. You should ideally press down about 5 centimeters into the chest cavity and then release. Do 103 chest compressions per minute.
Step 11: If you get tired and want somebody else to take over the compressions, make sure there is only a gap of 10 seconds during the swap.
Step 12: If the patient still does not regain a heartbeat and is not breathing, you could also give him/her mouth-to mouth resuscitation. Although many medical bodies like the American Heart Association no longer consider this resuscitation technique an important part of CPR, you may do the technique in dire cases.
Step 13: Place your mouth on the person’s mouth and pinch his/her nose closed. Then, take a deep breath and exhale into the patient’s mouth.
Step 14: Watch for the rise and fall of the patient’s chest. Make sure the air is entering the person’s chest and not his/her stomach. This is an important indicator to identify whether your resuscitation technique is actually working.
Step 15: Give two rescue breaths. Then, Repeat the cycle of 30 chest compressions, followed by two rescue breaths. You should try to maintain a rhythmic cycle.
Step 16: Ideally perform CPR for 2 minutes, i.e.; 5 cycles of compressions and breaths, before checking for signs of life.
CPR is an essential life saving technique, and being trained is an important aspect be it a road accident, or a personal injury. There are a number of institutions in India that offer classes in this technique. For more information click here.
Another form of resuscitation is the EAR technique, you could read more about the technique here.
Picture courtesy: wikihow.com

